DIY Vertical Planter
This DIY Vertical Planter is the perfect garden option for those with limited space. Grow your own herbs or flowers in this easy to maintain vertical planter.
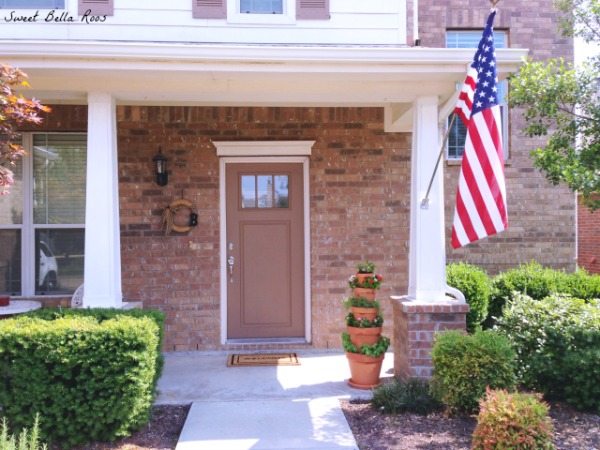
I am so happy with the way this project turned out! It makes me smile every time I walk past it on the front porch. It was super easy, and much like my ombré note cards, pretty self-explanatory.
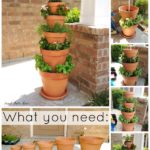
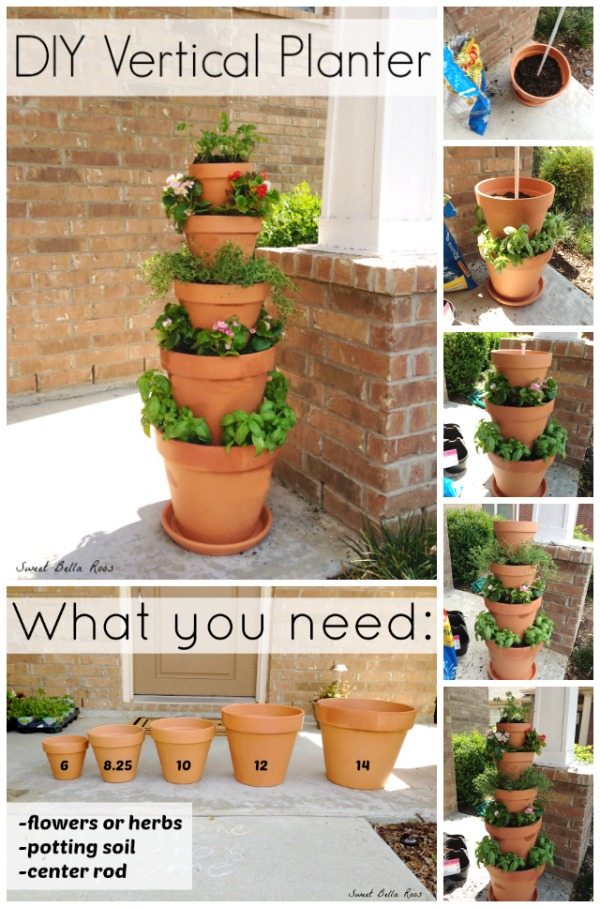
Here’s what you need to make your own DIY Vertical Planter:
- 14 in terra cotta pot
- 12 in terra cotta pot
- 10 in terra cotta pot
- 8.25 in terra cotta pot
- 6 in terra cotta pot
- 14 in terra cotta base
- potting soil
- flowers or herbs
- a wooden stake or rod, such as rebar
Note: You will need enough plants for five pots, but keep in mind they will only be on the edges. I was able to do the entire project with one bag of potting soil, and had a little left over. I purchased a wooden stake, but it was too thick to fit through the center holes. (Keep this in mind when purchasing.) I actually ended up using a curtain tension rod I had in my garage. It worked perfect for me, especially being extendable.
Place your base where you want your vertical planter to be. (I don’t recommend moving it after assembled, so it’s best to build where you want it.) Starting with the largest pot, fill it with dirt 3/4 of the way full and place the rod in the center. Plant your herbs or flowers on the outermost edge, and add more dirt as filler as needed. Place the 2nd largest pot in the center of the first pot. Continue this process until all five pots are stacked. Don’t fill the center all the way to the top with dirt, the next pot should sit down a couple inches inside the first pot.
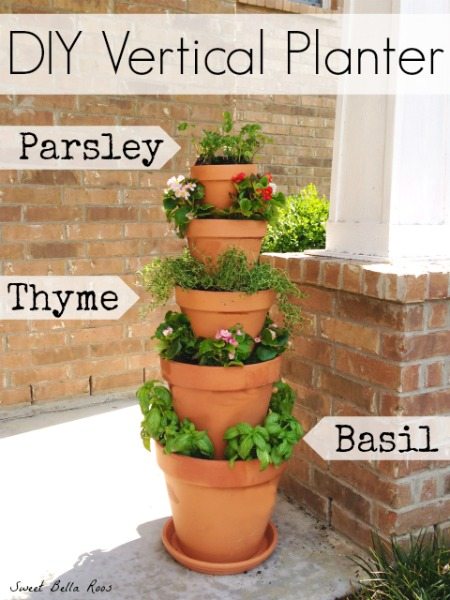
I decided to make my vertical planter multipurpose and used 3 of the 5 pots as an herb garden. This is a great option for people who want a small herb garden, or are running low on space. Would be perfect for an apartment balcony even! My basil is growing like crazy, we can’t make enough pesto to keep up. I planted begonias in the other pots because I liked the contrast they added to the herbs.
I have enjoyed this DIY vertical planter so much! I don’t consider myself to have a green thumb (I usually kill all of my indoor plants as soon as I buy them) but I am pretty proud of this project. It has been a lovely addition to our front porch!
You can find the tutorial for my $10 & 10 Minute Wreath here.
I am dying to paint my front door… any suggestions?


I love how u did that so now will do that for my front pouch now i well try that cause will make the pouch would look good. Thanks a lot it help me work with that i like it so now i well get busy doing that now.
Awesome share Emily. I live in Tasmania, Australia, and we get long dry summers. We might not be as hot as the rest of Australia, but we have a thick band of heavy clay that runs about a foot beneath our rocky soil and that makes gardening difficult to say the least. I have a big fully enclosed vegetable garden (possums and wallabies eat everything that isn’t protected or that isn’t poisonous around here 😉 ) and finding ways to increase my growing potential inside this safe space are like gold. You just gave me another option. Just about to throw the rats out of their winter tenancy and start all over again with the growing thang so just wanted to say “Cheers!” for this great idea that I am going to put into practice this year 🙂
Is the base attached to the planters, or are they just sitting in it? It might drain better (and prevent root rot) if it was attached to a little drainage shelf.
I am definitely going to try this, though, if my latest place for an herb garden doesn’t work out. I am having a difficult time finding a place where they don’t drown in our very wet winters.
I did this with allysum, as I love the flowing effect of it. I wanted it for my front yard under a tree. The top pot is tipped over, and the flowers are cascading down out of it. Great idea, and I get loads of compliments on it. This flower also comes back every year.
You could tilt the pots for a topsy-turvy effect.
Do you think that plastic pots would work? Or do they have to be terra cotta? may be a stupid question, but I don’t really have any terra cotta and I’m too cheap to buy them.
Curious as to why a rod is necessary if pots rest in the dirt of the other pot? Also, since under the porch do they grow okay in the shade or or they in the sun most of the time? Thanks for input from anyone.
Hi Wendy, I put a rod for extra stabilization. It gets pretty windy here in Texas, so it’s just for added support. As for the shade, it would depend on your situation. My planter is on the edge so it sees quite a bit of sun through the day, with partial shade as well.
What a great space saver and great tutorial. I just wanted to let you know that I am linking to this post on 4/7 at Simply Creative Living if you don’t mind.
I live in the desert and anything left outside in the summer cooks. This idea would be great right in my kitchen for having fresh herbs at hand. Thanks.
Such a great idea. I would love it if you joined and contribute your awesome posts at my link party at City of Creative Dreams on Fridays 😀 Hope to see you there at City of Creative Dreams Link Party
I would paint your door red…In Feng Shui and early American customs, a red door meant “welcome”. You have a very welcoming looking house….very pretty.
@Cheri, I was thinking a cranberry colour would be nice, too.
Oooooh, I love it! Great tutorial. Thanks for sharing!
I love this!! It’s exactly what I need for my balcony. Pinning it~
I hopped over from the Whatsits Link Up.
~Cheryl
http://snaps-of-ginger.blogspot.com
Pretty and practical! That’s my kind of project! Fresh herbs are the best. 🙂
Found you through Tip Me Tuesday!
This is lovely – fabulous way to grow herbs!
Love the tower. Paint the door cobalt blue; it will look great with the brick and the flag.
Wondering what color you painted the door. I liked the stack-
able garden pot idea very much.
I have been wanting to plant some herbs in a container, and love this idea! Thanks for sharing and breaking down the pot sizes that you used.
this is a great way to plant love how it looks and awesome space saver as well
come see me angie at annies home ( http://shopannies.blogspot.com )
I love this idea! Do you think this would still work if you didn’t actually plant from a flowering plants and just planted seeds? I have wanted to start my own herb garden for so long, and I would love to try to start it from a seed. I don’t see why it wouldn’t but just thought I would ask. P.s. paint the door a deep turquoise for a pop!
Hi Kim- I don’t see why that wouldn’t work! 🙂 I’m just impatient
I love your vertical flower pots with the curtiain rod to stack them did you put a hole through the centre to add the rod?
Hi Kathy- the pots I purchased from Home Depot came with the hole.
I was wondering what area you lived in. I want to do a vertical herb garden, but I was told the herbs may not hold up during the winter months in PA.