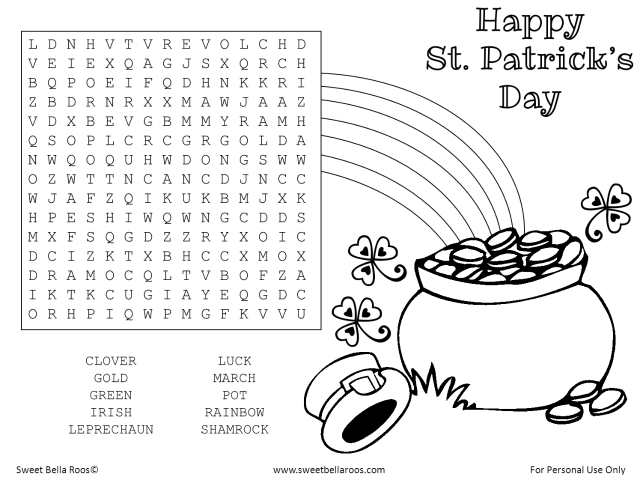
DIY Fairy Garden
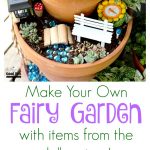
An easy tutorial on how to make your own DIY Fairy Garden. I made this fairy garden with my kids after we found tons of cute, inexpensive supplies at our neighborhood dollar store.
Our small town doesn’t have much in the way of shopping- we only have one convenience grocery store, an auto parts store, and a dollar store. It’s located right across from the school campuses so the kids often ask if we can stop by on our way home from picking up my oldest from school. I give them each a dollar and they carefully peruse the aisles deciding how best to spend it. One day they pooled their money together to purchase a $2 whoopee cushion and had more fun with that thing than I think they have with any of their electronic devices.
When I saw all of the cute seasonal lawn and garden items available I knew they would be perfect for a fairy garden. Both of my girls are big into crafts and we had been wanting to make a DIY Fairy Garden for weeks. (I thought a fairy garden would be the perfect way to repurpose the terra cotta pots from my DIY Vertical Planter that I had to disassemble when we moved a few months back.) Here’s what we purchased:
- Wood Craft Sticks $1
- Lantern Solar Stake x2 $2ea
- Blue Assorted Glass Gems $2
- Driftwood Decorative Filler $2
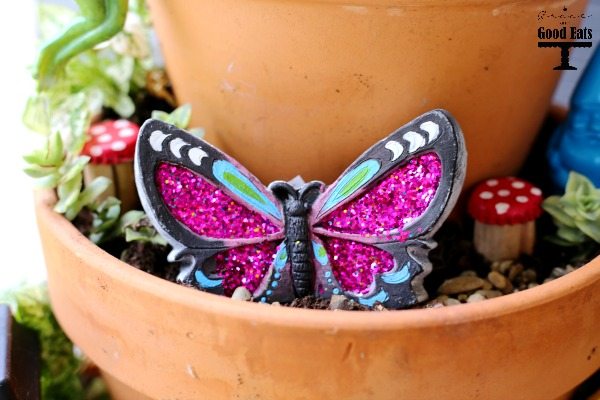
- Glittery Butterfly x2 $1ea
- Decorative Flower $1
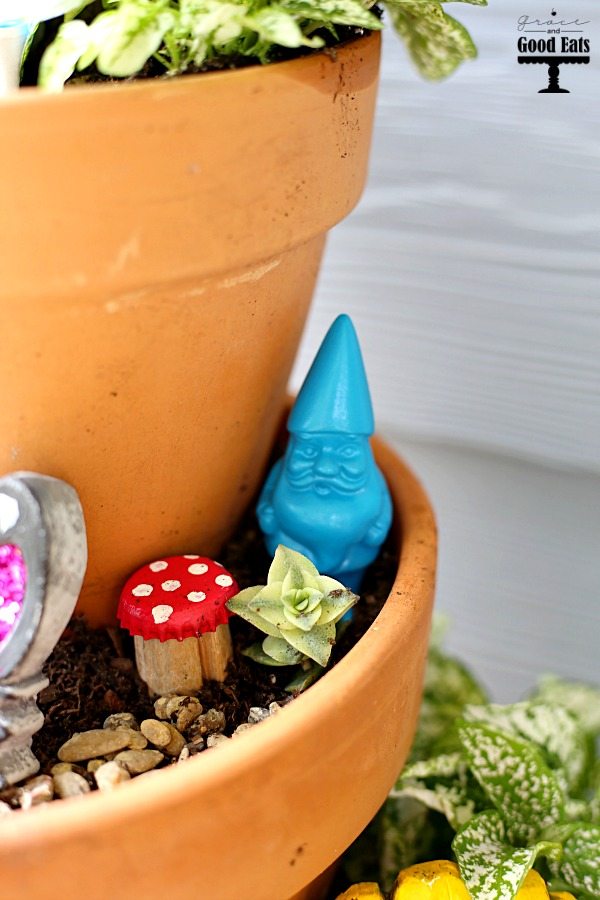
- Gnome $1
- Hanging Frog $1
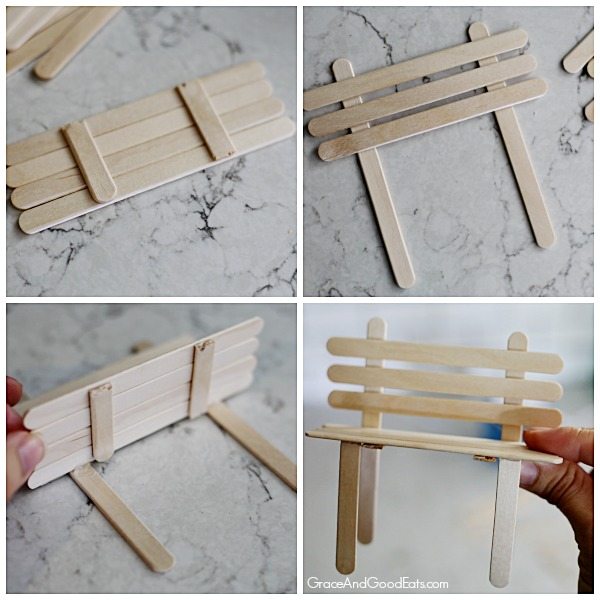
To make the DIY Fairy Bench start by breaking one stick into thirds. (Use scissors to trim the rough edges as necessary.) Hot glue four sticks together using two of the broken pieces as a brace (top left picture above). Next, create the back of the bench by gluing three sticks horizontally, slightly spaced apart, onto two vertical sticks (top right picture above). Attach the seat of the bench with hot glue to the two vertical sticks from the bench’s back (bottom left picture above). Break another stick in half to create the two front legs and attach these with hot glue (bottom right picture above). Don’t stress if the legs are not perfectly all the same length, as any imperfections will be hid when you insert the legs into the dirt. After the bench was assembled, I let the girls paint it white.
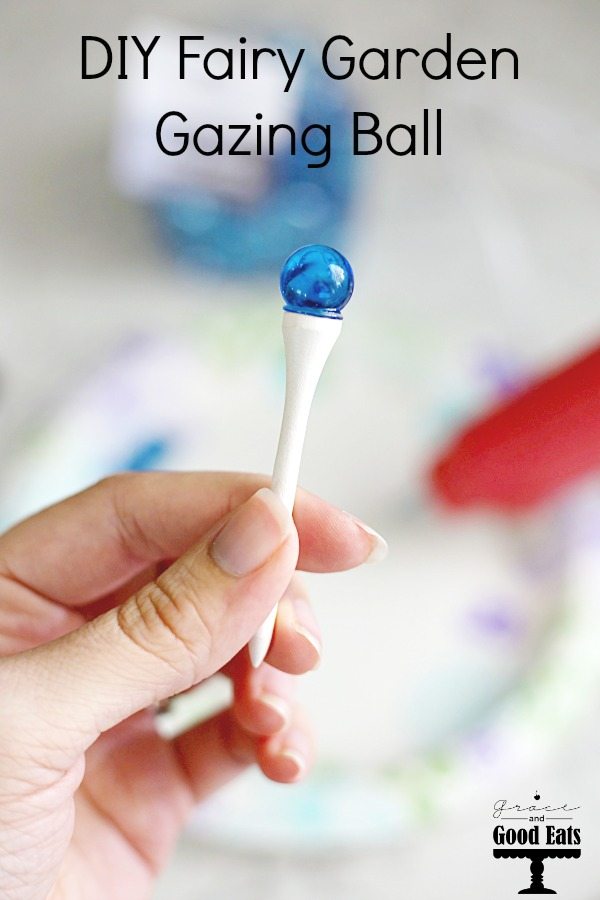
I raided my husband’s golf bag to find a few golf tees. (Lucky for me, they were already painted white!) I then hot glued a marble to the top of each golf tee to create a DIY Fairy Garden Gazing Ball.
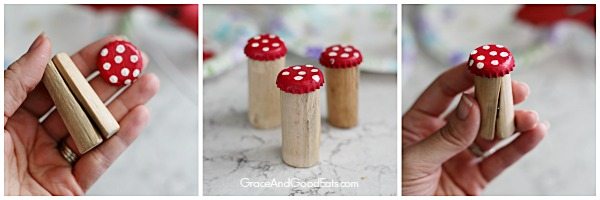
I made these DIY Fairy Garden Mushrooms from recycled bottle caps. I had the girls paint the top of each bottle cap red. After allowing them to dry, they used a cotton swab to dot each one with white paint. I glued two pieces of the decorative wood filler to create the base of the mushroom and then glued the cap on top. (Recycled corks would also work great for the base!)
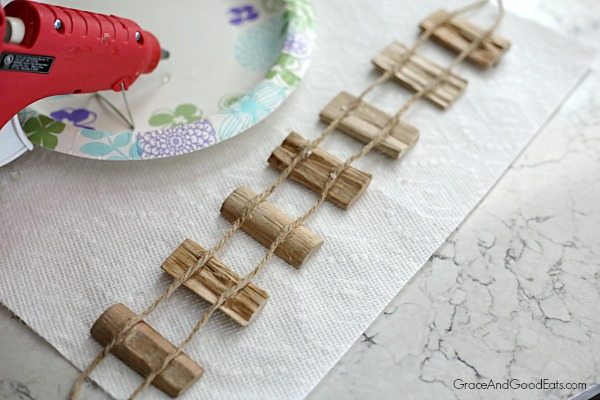
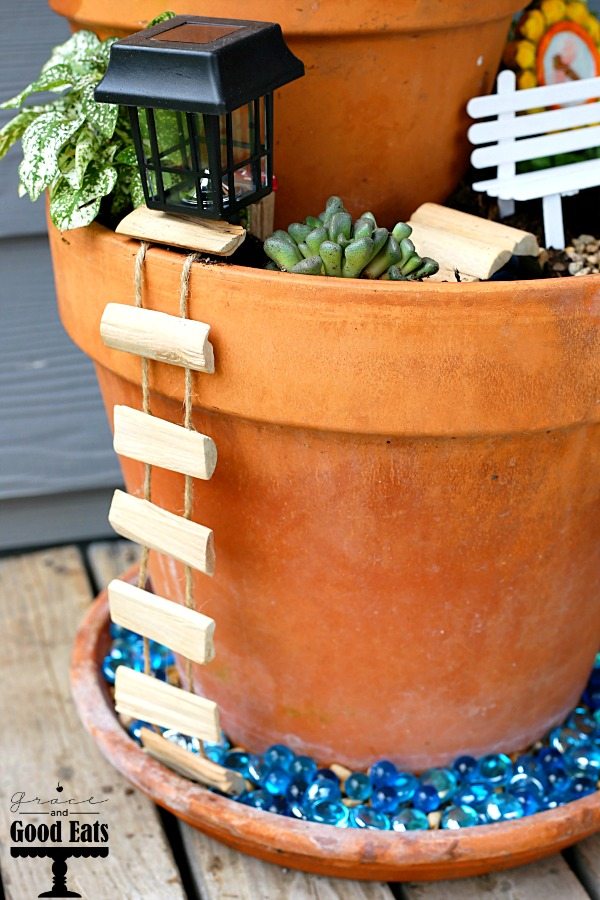
The little DIY Fairy Garden Ladder is Sophia’s favorite feature in the fairy garden. She lined up all of the wooden pieces and I adhered two pieces of jute cord to the back with hot glue. (The jute cord can also be found at the dollar store, I already had some in my craft stash from a previous buy.)
I used the rest of the wood filler to create a DIY Fairy Garden Bridge. I used scissors to cut the top inch off a plastic cup and the removed the top lip. I used hot glue to carefully attach six of the wooden pieces- be very careful during this step because the glue may heat through the plastic. I left a few inches of plastic cup on either side of the wood to tuck into the dirt. The plastic from the cup worked perfectly to support the wood and give the rounded look I was going for.

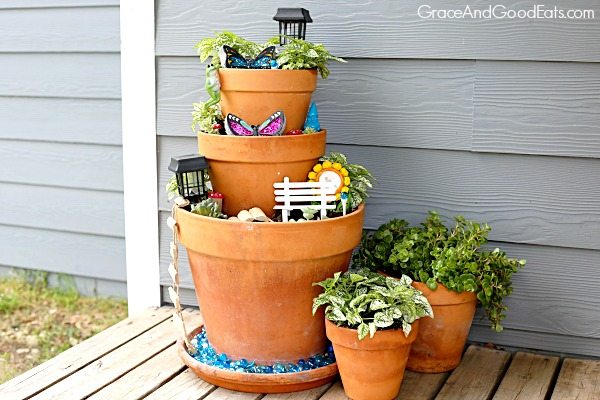
I stacked 14in, 10in, and 8.25in terra cotta pots to create the base of my homemade fairy garden. Be sure to fill the pots almost to the top, leaving just a little give to make room for plants.

I would also recommend to build your garden in the spot that you want it to be, as the finished product is heavy! After I had the base ready to go, I let the girls help me decided where to place all of our fairy garden accessories.
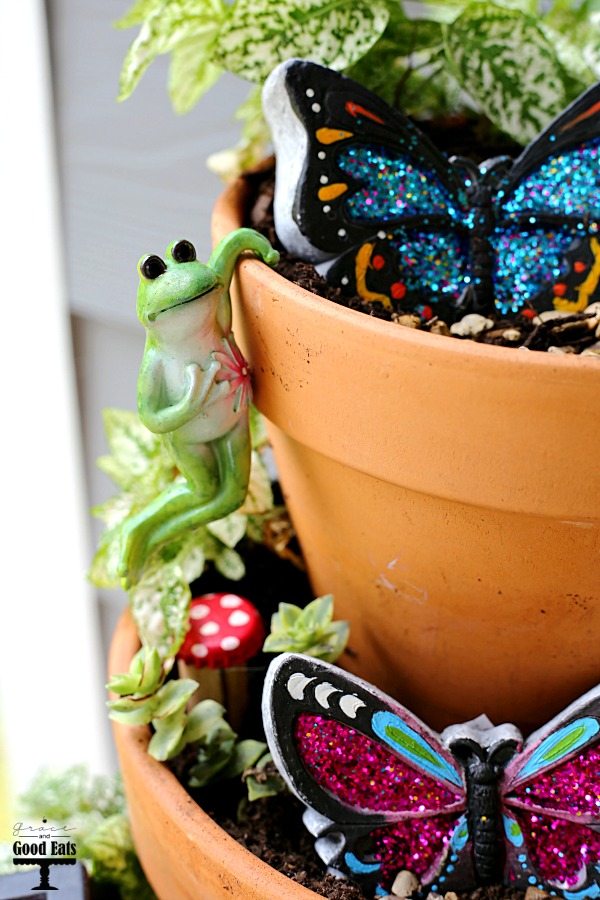
I really loved these glittery butterflies but wasn’t sure I would have the space for them or if they would look ok due to the sizing of everything. I think they turned out perfect and helped add a little more whimsy to the whole project.
And, of course, what’s a garden without a gnome? These were available at in blue or green, I opted for blue to stand out amongst the plants. This little guy is Isabella’s favorite addition.
I finished off the fairy garden with some polka dot (or freckle face) plants and small succulents. I originally planned to add some flowers, but I really liked the way the bright colors of all of the other pieces pop against the greenery instead. I added more blue gems under the bridge to give the effect of water, as well as in the rim of the base. I sprinkled a few handfuls of pea pebbles between the three pots.
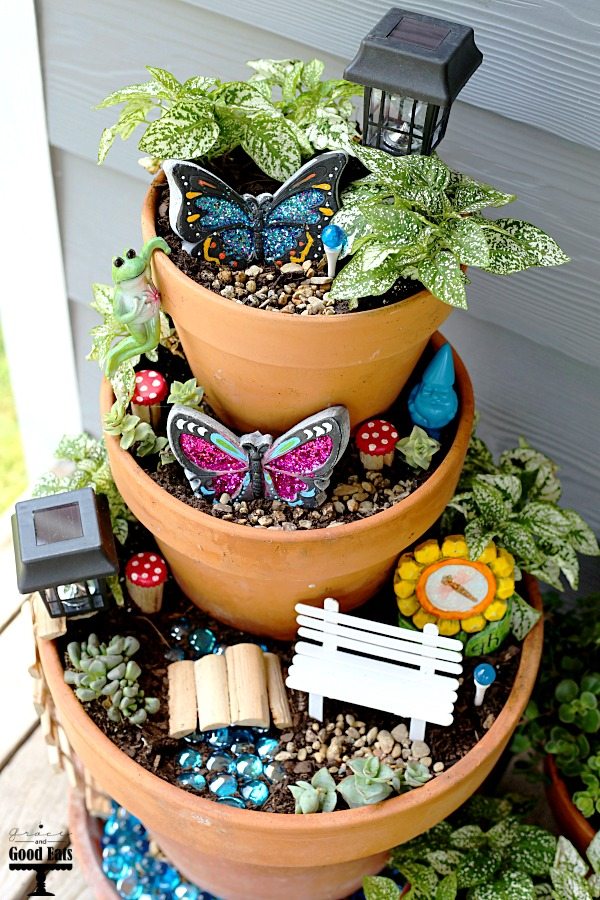
I couldn’t be happier with the way this DIY Fairy Garden turned out! The girls had a blast making it with me and it was super simple (my kind of craft!). Being able to find all of the supplies we needed at the dollar store in our tiny town was a lifesaver and saved me 45-60 minutes of driving to the nearest specialty craft store. It turned a dead space on our front porch into a cute little feature and it makes me happy every time I walk past it.